

*Makes 12 rolls/twists
Dough:
¾ cup buttermilk, warm (I pour the buttermilk in a glass liquid measuring cup and microwave for 1 minute on 50% power)
6 tablespoons butter, melted and cooled
3 large eggs
4 ¼ cups (21 ¼ ounces) flour
¼ cup (1 ¾ ounces) sugar
2 ¼ teaspoons instant yeast
1 ¼ teaspoons salt
Orange Filling:
1/2 cup softened butter
1 cup sugar
2 tablespoons freshly squeezed orange juice
Grated orange rind/zest from two large oranges (reserving 1/2 teaspoon grated rind for the glaze below)
Orange Glaze:
1 1/2 cups powdered sugar
3 tablespoons freshly squeezed orange juice from about 1 orange
1/2 teaspoon grated orange rind/zest reserved from the filling above
For the dough, whisk the warmed buttermilk and butter together in a large liquid measuring cup. Combine 4 cups of flour, sugar, yeast and salt together in a standing mixer fitted with dough hook (or you can use a large bowl and mix with a wooden spoon or electric handheld mixer). With the mixer on low speed, add the buttermilk mixture and eggs and mix until the dough comes together, about 2 minutes. Increase the mixer to medium speed and knead the dough until it is smooth and elastic, about 10 minutes (knead for 15-18 minutes by hand). If after 5 minutes of kneading, the dough is still overly sticky, add 1/4 cup flour 1 tablespoon at a time until the dough clears the sides of the bowl but has a slight tacky feel when pressed between your fingertips.
Place the dough in a large, lightly greased bowl and cover the top tightly with plastic wrap. Let the dough rise in a warm place until doubled, around 2 to 2 ½ hours, depending on the warmth of your kitchen.
For the filling, combine all the filling ingredients (reserving 1/2 teaspoon orange zest for the glaze) in a small bowl and mix well. Set aside.
When the dough is ready, turn it out onto a lightly floured counter (I use my roul’pat for this step--ya'll need one of these babies!) and press it into about a 16 by 12-inch rectangle (if you have doubled the recipe, split the dough in half and roll out one half at a time). Gently brush the filling mixture over the rectangle, using an offset spatula or rubber spatula.
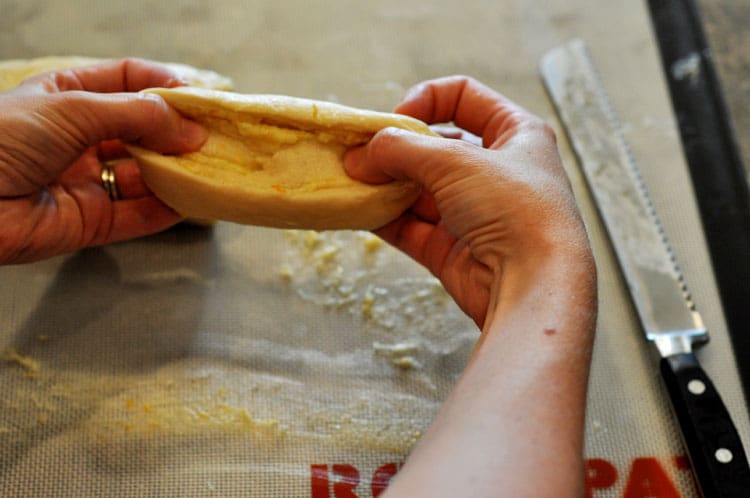
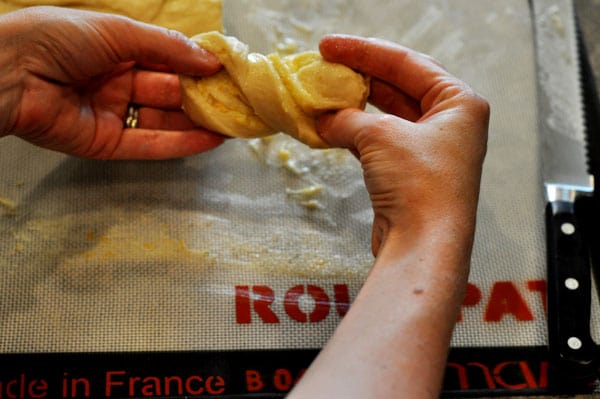
Lift the longest edge closest to you and begin rolling the dough into a tight log. Pinch the seam closed and roll the log so it is seam side down. Using dental floss, slice the log into 12 evenly sized rolls, more or less. You can slice them thinner or thicker as you like. For a traditional cinnamon-roll-look, arrange the rolls cut side down on a lined or lightly greased baking pan. If you want to try the twist method (see the pictures below), one at a time grab each sliced roll and holding on to either end simultaneously pull and twist the roll into a figure eight and place it on the prepared pan. Cover the rolls with lightly greased plastic wrap. Let the rolls rise in a warm place until doubled, 1 to 1 ½ hours.
Bake the rolls at 350 degrees for 22-25 minutes, until the rolls are lightly golden on top and cooked through. While the rolls are baking, mix together the glaze ingredients. Drizzle the glaze over the warm rolls. (I used a brush and brushed it over the entire roll instead of just drizzling it)
Grasping each side, gently stretch the roll…
Grasping each side, gently stretch the roll…

…and twist it before placing on the baking sheet.

Place the rolls about an inch to two inches apart.
 Bake and devour!
Recipe Source: {My Kitchen Cafe}